
Now Autumn is in full swing, gardeners everywhere are preparing their beds for next spring’s blooms, including me! For those who adore the vibrant colours of tulips, there’s still time to get those bulbs in the ground. But how late can you plant tulip bulbs? In this blog post, I’m going to explore this topic in great detail! So grab a few minutes and read along with me.
Planting tulip bulbs in late autumn or early winter offers several advantages. The cooler soil temperatures help prevent fungal diseases, and the bulbs have ample time to establish strong root systems before spring. Gardeners can even plant their tulips after the first light frost, as long as they can still work the soil.

For those who’ve missed the ideal planting window, there’s no need to fret. Tulip bulbs are surprisingly resilient and can be stored in a cool, dry place until the following autumn if necessary. With proper care and timing, these hardy little bulbs will reward patient gardeners with a dazzling display of springtime colour.
Tulip bulbs can be planted as late as early winter, provided the ground hasn’t frozen solid.
Understanding Tulips and Their Life Cycle
Tulips are beloved spring-flowering bulbs that bring vibrant colours to gardens. These perennial plants have a fascinating life cycle and come in numerous varieties to suit different preferences and growing conditions.
Varieties of Tulips
Tulips offer a wide range of options for gardeners. Species tulips, the wild ancestors of cultivated varieties, are smaller and more naturalised. They’re perfect for rock gardens or borders. Hybrid tulips come in an array of colours, shapes, and sizes. Some popular types include:
• Darwin Hybrids: Large, cup-shaped flowers on tall stems
• Parrot Tulips: Frilly, feathered petals in striking colours
• Fringed Tulips: Delicate, lacy edges on elegant blooms
• Double Tulips: Peony-like flowers with extra petals
Each variety has unique characteristics, blooming times, and care requirements. Choosing a mix can extend the flowering season and create diverse garden displays.

Life Cycle of Spring-Flowering Bulbs
Tulips, like other spring-flowering bulbs, have a distinct annual cycle. It begins in autumn when bulbs are planted. During winter, they undergo a crucial chilling period, typically needing 10-14 weeks of cold temperatures.
In early spring, green shoots emerge from the soil. As temperatures rise, stems elongate and buds form. Flowering occurs in mid to late spring, with exact timing depending on the variety and climate.
After blooming, leaves continue photosynthesising to store energy in the bulb. By early summer, foliage yellows and dies back. The bulb enters dormancy, resting until the cycle begins anew in autumn.
Prime Planting Time for Tulip Bulbs
Timing is crucial for planting tulip bulbs to ensure a vibrant spring display. The ideal planting period varies depending on your climate and location, with cooler regions requiring earlier planting than warmer areas.
Importance of Planting at the Best Time
Planting tulip bulbs at the optimal time allows them to establish strong root systems before winter. This gives the bulbs the best chance of producing healthy flowers in spring. Autumn is generally the prime season for planting, as soil temperatures begin to cool.
The ‘sweet spot’ for planting is when soil temperatures reach about 13°C (55°F). This typically occurs 6-8 weeks before the ground freezes. Most likely around late fall. Planting too early can lead to premature growth, whilst planting too late may not give bulbs enough time to develop roots.
For a spectacular spring show, aim to plant tulip bulbs between September and mid-November in most regions. This timing ensures the bulbs receive the necessary cold weather period for proper growth, giving you the best display the following spring.
Timing Advice for Different Climates
In cold climates (USDA hardiness zones 3-5), plant tulip bulbs in September or early October. This gives them ample time to root before the ground freezes solid. Areas with harsh winters may benefit from adding a layer of mulch for extra protection.
For moderate climates (zones 6-7), October is often the ideal planting month. The soil is still workable, and temperatures are cool enough for proper bulb development.
Warm climates (zones 8-9) can delay planting until November or even early December. In these regions, you may need to pre-chill bulbs in the refrigerator for 6-8 weeks before planting to mimic their natural winter dormancy.
Choosing the Perfect Planting Site
Selecting an ideal location for tulip bulbs is crucial for their health and vibrant blooms. The right soil composition and light conditions set the stage for stunning spring displays.
Soil Requirements for Tulips
Tulips thrive in well-drained soil that doesn’t retain excess moisture. Sandy or loamy soil with good drainage is optimal for these beauties. Fast-draining soil prevents bulb rot and fungal diseases.
To improve heavy clay soil, mix in organic matter like compost or well-rotted manure. This enhances drainage and provides nutrients. Raised beds can be an excellent solution for areas with poor soil conditions.
Ensure the planting site has a pH between 6.0 and 7.0. If needed, adjust the soil pH with lime or sulphur. A soil test can help determine the exact requirements.

Light Conditions for Optimal Growth
Tulips love basking in full sun, soaking up at least six hours of direct sunlight daily. This exposure promotes strong stem growth and vibrant blooms.
In regions with scorching summers, partial shade can protect tulips from excessive heat. Afternoon shade is particularly beneficial in these climates.
Consider the surrounding landscape when choosing a spot. Avoid areas near large trees or shrubs that might compete for nutrients and water. Plant tulips where they’ll receive morning sun to help dry dew quickly, reducing the risk of fungal issues.
Remember, proper air circulation is essential. Space bulbs adequately to allow for good airflow between plants.
Preparing for Planting
Proper preparation is key to ensuring healthy tulip bulbs and vibrant blooms. Taking a few essential steps before planting can make a world of difference in the success of your tulip garden.
Enriching Soil Prior to Planting
Start by testing your soil pH, aiming for a slightly acidic to neutral range of 6.0 to 7.0. If needed, adjust with lime or sulphur. Tulips thrive in well-draining soil rich in organic matter. Work in plenty of compost or well-rotted manure to improve soil structure and fertility.
Add a handful of bone meal to each planting hole. This slow-release fertiliser provides phosphorus, essential for strong root development. Sprinkle a balanced bulb fertiliser over the planting area and gently work it into the top few inches of soil.
For heavy clay soils, mix in some grit or sand to improve drainage. In sandy soils, add extra organic matter to help retain moisture.
Protection Against Pests and Diseases
Tulips can fall prey to various pests and diseases, but preventive measures can help safeguard your bulbs. Before planting, inspect bulbs for signs of damage or disease. Discard any that are soft, mouldy, or show symptoms of tulip fire, a fungal disease that causes distorted leaves and flowers.
To deter rodents, consider lining planting holes with chicken wire. This creates a barrier that allows the tulips to grow through but keeps pests at bay. Alternatively, plant bulbs in wire cages or mix sharp gravel into the soil around them.
Proper spacing between bulbs (about 4-6 inches apart) promotes good air circulation, reducing the risk of fungal diseases. In damp areas, a light dusting of fungicide can offer additional protection.
Step-by-Step Planting Guide for Tulip Bulbs
Planting tulip bulbs correctly ensures the best shot at spring blooms. Follow these tips for proper depth, spacing, and orientation to give your tulips the best start.
The Correct Depth and Spacing
Plant tulip bulbs about 15-20 cm deep, measuring from the base of the bulb. Use a bulb planter to achieve consistent depth across your planting area. Space bulbs 10-15 cm apart to allow room for growth.
For a natural look, plant in groups of 5-7 bulbs. In containers, you can place them closer together, about 5-7 cm apart.
Adjust planting depth based on soil type:
- Sandy soil: Plant slightly deeper
- Clay soil: Plant a bit shallower
Remember, larger bulbs may need to be planted a touch deeper than smaller ones.
Expert Tips for Bulb Orientation
Always plant tulip bulbs with the pointy end facing upwards. This is crucial for proper growth, as the shoot emerges from this end.
If you’re unsure which end is which, look for the flatter base where roots will form. This should face downwards.

For best results, gently press the bulb into the soil to ensure good contact. This helps prevent air pockets that could hinder root development.
When planting a bunch of bulbs, take care to orient each one correctly. It’s worth the extra effort for a stunning spring display.
Aftercare Post Planting
Proper care after planting tulip bulbs is crucial for their survival and blooming success. Attention to watering, mulching, and winter protection helps ensure vibrant spring flowers.
Watering and Mulching
After planting tulip bulbs, give them a thorough watering to settle the soil around them. This initial drink encourages root growth before winter sets in. Keep the soil moist but not waterlogged.
Apply a 2-3 inch layer of mulch over the planted area. Organic materials like straw, bark chips, or leaf mould work well. Mulch helps retain moisture and regulates soil temperature.
In drier regions, check soil moisture regularly. Water if the top inch of soil feels dry. Avoid overwatering, as tulip bulbs can rot in soggy conditions.
Winter Care for Bulbs
As temperatures drop, the ground may freeze. This natural process is beneficial for tulips, providing the cold period they need for proper growth.
In areas with harsh winters, add an extra layer of mulch after the first hard frost. This insulates the soil and protects bulbs from extreme temperature fluctuations.
Remove heavy snow from tulip beds to prevent soil compaction. However, a light snow cover acts as natural insulation.
If a late spring frost threatens emerging shoots, cover them with fleece or straw. Remove these covers once the danger has passed to allow sunlight and air circulation.
Expectations for Growth and Blooming
Planting tulip bulbs sets the stage for a colourful spring display. The journey from bulb to bloom involves several stages and factors that influence the ultimate outcome.
When to Anticipate Tulip Blooms
Tulips typically flower in spring, with bloom times varying based on variety and climate. Early-season tulips may emerge as soon as late winter in milder areas, while late-season varieties might not show their colours until May.

Most tulips will bloom 3-8 weeks after the last frost date. Keep an eye out for green shoots poking through the soil as temperatures warm. This is a sign that your tulips are on their way!
Bloom duration usually lasts 1-2 weeks per variety. For a longer display, plant a mix of early, mid, and late-season tulips.
Factors Affecting Tulip Growth
Several elements play crucial roles in tulip development:
- Soil quality: Well-draining, fertile soil promotes healthy growth.
- Sunlight: Tulips thrive in full sun to partial shade.
- Water: Consistent moisture is key, especially during active growth.
- Temperature: Cold winters followed by gradual spring warming are ideal.
Planting depth and spacing also impact growth. Plant bulbs 4-6 inches deep and 4-6 inches apart for best results.
Pests and diseases can hinder tulip growth. Watch for signs of damage and address issues promptly to ensure beautiful blooms come spring.
Tips for Getting the Most Out of Your Tulips
Proper care and maintenance are crucial for stunning tulip displays. Fertilising, deadheading, and strategic replanting can significantly enhance your tulips’ performance and longevity.
Fertilising and Deadheading
Tulips benefit from regular fertilisation. Apply a balanced 10-10-10 fertiliser in autumn when planting bulbs, and again in spring as shoots emerge. Sprinkle the fertiliser around the base of the plants, avoiding direct contact with stems or leaves.
Deadheading is essential for maintaining a tidy appearance and redirecting energy to the bulbs. Once flowers fade, snip off the blooms but leave the foliage intact. This allows the plant to continue photosynthesising and storing nutrients for next year’s growth.
For a vibrant display, consider planting tulips in groups of odd numbers. This creates a more natural, eye-catching arrangement in your garden beds.
Replacing or Replanting Tulips
As a general rule, tulips perform best in their first year. To maintain a spectacular show each spring, many gardeners treat tulips as annuals and replace them yearly.
If you decide to replant, dig up bulbs after the foliage has yellowed and dried. Clean the bulbs and store them in a cool, dry place until autumn. When replanting, choose a new spot in the garden to prevent soil depletion and disease build-up.
For those preferring a low-maintenance approach, visit your local garden centre for new bulbs each autumn. This ensures healthy, vigorous plants and allows you to experiment with different varieties and colour combinations.
Creative Ideas for your Tulip Display
Transform your garden into a stunning tulip showcase with innovative planting techniques. Mix colours, varieties, and companion plants to create eye-catching designs that will delight throughout spring.
Companion Planting for Visual Appeal
Pair tulips with complementary flowers to enhance their beauty. Plant low-growing forget-me-nots or pansies around the base of tulips for a charming carpet effect. Interplant daffodils or grape hyacinths for a multi-layered display.
Consider adding ornamental grasses or evergreen shrubs as a backdrop to make tulip colours pop. For a cottage garden feel, mix tulips with perennials like peonies or columbines.
Darwin hybrid tulips work brilliantly with spring-flowering bulbs of similar heights. Their sturdy stems and large blooms create a full look when planted en masse.
Designing Patterns with Different Tulip Varieties
Create striking patterns using various tulip types and colours. Plant concentric circles of contrasting hues for a bold target design. Or try a checkerboard pattern with alternating squares of different varieties.
For a natural look, scatter tulip bulbs randomly within a designated area. Mix early, mid, and late-season tulips to extend the flowering period and add depth to your display.
Experiment with ombre effects by planting graduated shades of the same colour. Start with pale pink at one end, transitioning to deep magenta at the other.
Garden designers often use hybrid tulips to achieve a uniform height and bloom time, perfect for formal arrangements.
Anticipating and Planning for Next Season
Planning ahead ensures a vibrant spring garden. Proper storage and care of tulip bulbs during the off-season maximises their potential for stunning blooms next year.
Storing Bulbs for the Next Planting
After tulips finish blooming, allow the foliage to die back naturally. Once yellowed, carefully dig up the bulbs and remove any excess soil. Let them dry in a shaded, well-ventilated area for a few days.
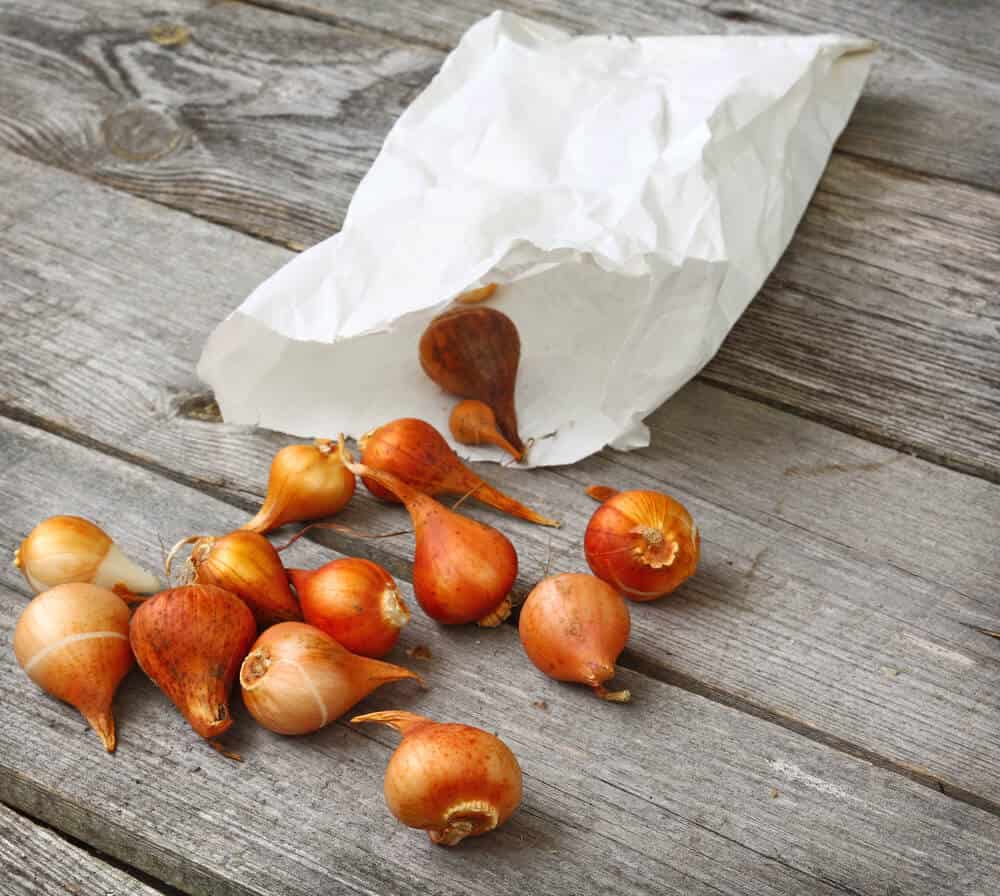
Place the cleaned, dry bulbs in a paper bag or mesh sack. Store in a cool, dark place like a basement or garage. The ideal temperature is around 15-20°C.
Check bulbs periodically for signs of mould or rot. Discard any that feel soft or show visible damage.
Continual Growth and Care for Perennial Success
For perennial tulips, leave bulbs in the ground and focus on post-bloom care. Cut off spent flowers but leave foliage intact to feed the bulb.
Once leaves are yellow, trim them back. Apply a layer of compost around the planting area to nourish the soil.
In late summer, top-dress with a balanced, slow-release fertiliser. Water deeply if rainfall is scarce to encourage strong root development.
Mark tulip locations to avoid accidentally disturbing them during autumn garden tasks. This also helps with planning complementary plantings for next season’s display.
I hope this answers your question about how late can you plant tulip bulbs. If you have any further questions, please as away in the comments below!