
Building a garden gate is a fairly simple DIY task. However, before you get started, you must understand the steps involved and the tools that are required to ensure your DIY gate installation is successful. It’s one of the great outdoor projects that you will get a lot of satisfaction in building. If you are wondering, how do I make a simple wood garden gate? The following guide will provide all the answers. Here, we will outline each step to help you understand how to build a strong backyard gate.
Several design options exist, from classic timber to rustic cedar, each offering a unique charm to the garden’s entrance. When selecting a style, it’s important to consider both the garden’s layout and the desired level of privacy. The construction process involves choosing the right tools and materials, measuring accurately, and fitting the gate securely into position.
A project like this calls for an approach that balances precision with creativity, allowing for a gate that is reliable and tailored to your taste. With tutorials and various design plans available, gardeners can find inspiration to construct a gate that complements their garden, providing both a function and an individual touch to their green sanctuary. So let’s get planning!

Planning Your Garden Gate
When planning a garden gate, you must consider several key factors. This is to ensure that the gate is not only aesthetically pleasing but also functional for its intended purpose.
Determining the Size
The size of the wood gate is a critical starting point. Measure the width of the garden’s entry point to establish the precise width of the gates. Standard sizes often range from narrow gates at approximately 90 cm to wider ones that may measure up to 120 cm or more. For height, while keeping in mind privacy and security, the height of your gate should be at least 90 cm tall, which is comfortable for most users to open.
Choosing the Type of Wood
Selecting the right type of wood is essential for durability and the desired appearance. Hardwoods such as oak or teak are known for their resistance to decay and can give years of service. Softwoods, like pine, are economical options but may require protective treatments to withstand the elements. Pressure-treated softwood is often a solid choice for a DIY gate, balancing cost and longevity.
The most important material for building a garden gate is timber. Some of the most popular types of timber for garden gates include:
- Spruce
- Fir
- Cedar
- Redwood
- Cypress
- Pine
- Oak
- Teak
All of these timber options are durable and can therefore withstand harsh weather conditions, and some offer rot resistance (cypress and cedar). Some are more affordable than others, so if you are on a budget, you may want to opt for spruce, as it is the least expensive of all the different types of timber.
When selecting wood for a garden gate, the pros and cons of each wood type should be considered based on factors such as durability, resistance to decay and insects, maintenance needs, and aesthetics. Here’s a summary for each type:
Spruce
Pros:
– Generally more affordable than some other wood options.
– Lighter weight, which can make installation easier.
Cons:
– Less resistant to rot and decay compared to woods like cedar or redwood.
– May require more maintenance, such as regular staining or painting to protect against the elements.
Fir
Pros:
– Strong and stiff, making it a good choice for structural purposes.
– More affordable compared to some other types of wood.
Cons:
– Not as naturally resistant to rot or severe weather conditions, often necessitating additional treatment.
Cedar
Pros:
– Naturally resistant to rot, decay, and insect infestations, making it highly durable for outdoor use.
– Aesthetically pleasing with a natural reddish hue and pleasant scent.
– Doesn’t require as much maintenance as some other woods.
Cons:
– Can be more expensive than options like pine or spruce.
– Softer wood which may be more prone to dents and scratches.
Redwood
Pros:
– Highly resistant to decay and insects.
– Beautiful natural color and grain patterns.
– Typically has a long lifespan with proper maintenance.
Cons:
– More expensive than many other types of wood.
– May require regular maintenance to maintain its color and protect it from the elements.
Cypress
Pros:
– Good durability and natural resistance to rot and insects.
– Can be a more affordable alternative to cedar or redwood.
Cons:
– Availability can be limited in some areas, potentially increasing costs.
– May grey over time if not properly maintained.
Pine
Pros:
– One of the most affordable wood options.
– Often treated to improve resistance to rot and insects.
Cons
– Softer wood that may be prone to damage and wear over time.
– Requires regular maintenance, such as painting or staining, to maintain its resistance to the elements.
Oak
Pros:
– Extremely strong and durable, making it a long-lasting option for garden gates.
– Resistant to fungal and insect attacks due to its density.
– Aesthetic appeal with its distinctive grain and texture.
Cons:
– Can be heavy, making installation more challenging.
– More expensive than some softwood alternatives.
– Requires maintenance to prevent weathering and to maintain its appearance.
Teak
Pros:
– Highly resistant to weather, rot, and pests due to natural oils and tight grain.
– Low maintenance, as it can weather to a silver-gray finish without losing integrity.
– Strong and durable, with a long lifespan even in harsh outdoor conditions.
Cons:
– One of the most expensive wood options for garden gates.
– Can be difficult to source due to export restrictions and ethical sourcing concerns.
– Hardwood, which means it can be tough to work with and may require special tools for cutting and installation.
Each wood type has its unique set of characteristics that make it more or less suitable for different environments and preferences. When choosing the right wood for a garden gate, it is important to weigh these factors against the specific needs of the project, including budget, climate, desired maintenance level, and aesthetic preferences.
Design Considerations
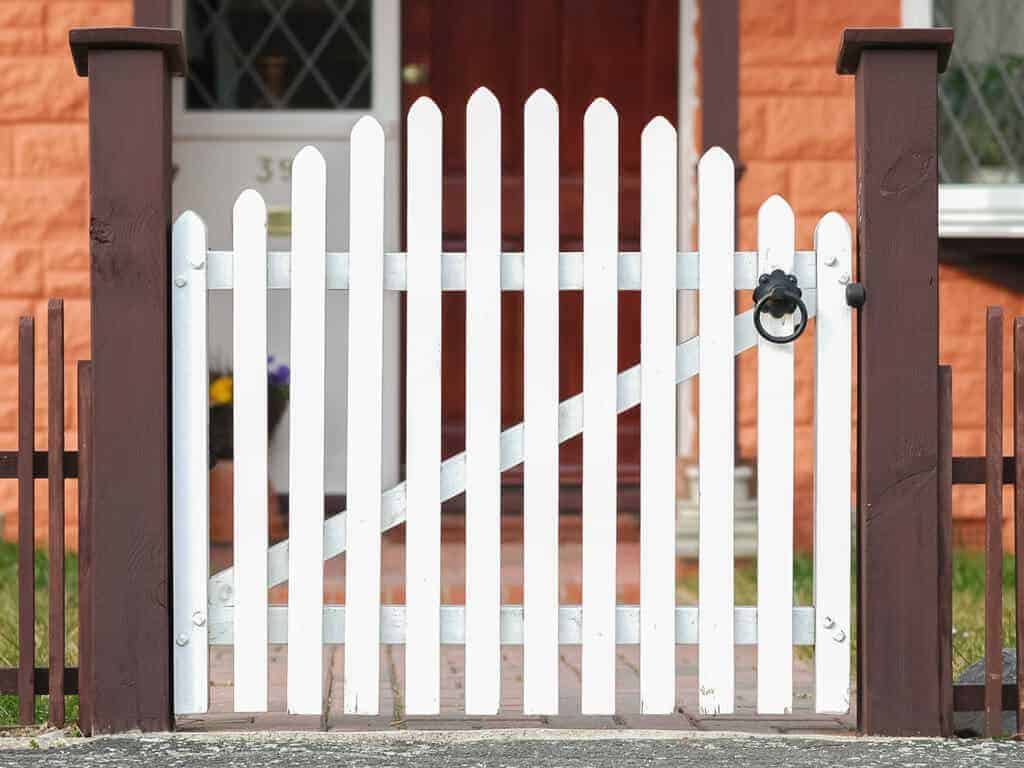
A well-designed gate should harmonise with the garden’s overall theme and the adjacent fencing. For example, incorporating a trellis can mirror the design of a trellis fence and allow climbing plants to integrate the gate into the garden’s landscape. It’s also helpful to mark out the intended gate shape with a straight edge and a pencil line to visualise the end product more effectively. The design should align with the individual’s woodworking skills to ensure a successful DIY gate project that results in a beautiful garden gate.
What Tools and Materials Do You Need to Build a Garden Gate?
Before making a garden gate, you need to make sure you have the right tools, so the job is done properly. Here is a list of tools you will need:
- Combi drill
- Drill bits
- Impact driver
- Hammer
- Chisel
- Miter saw
- Screwdriver
- Spirit level
- Tape measure
- Quick clamps
- External wood glue
- Screws
Selecting Materials
The choice of materials is pivotal for the construction of a stable and attractive garden gate. Cedar planks are highly recommended for their natural resistance to decay, and adding a wood stain can both enhance the visual appeal and extend the life of the gate. For structural support, gate posts must be robust and firmly anchored. Timber from a reputable timber merchant should be chosen for its quality and suitability. Fence pickets and pallet boards are additional options providing varied aesthetic results. It’s advisable to reference a free plan to ascertain the quantities and dimensions required before purchase.
- Wood: Cedar planks, fence pickets, pallet boards
- Protection: Wood stain (optional for aesthetics and durability)
- Support: Gate posts (must be sturdy and weather-resistant)
Gathering Tools
Before taking on this task, you need to make sure you have the right tools. RUKO offers a wide selection of drill bits that will help make your life easier when taking on DIY jobs like this one. Shop the range today or get in touch to find out which tools you need to build a garden gate.
Constructing a garden gate requires basic carpentry tools. Key among them is a circular saw, essential for cutting wood to the desired size. A tape measure is indispensable for precision, while a spirit level ensures the gate hangs correctly. The assembly process may require a pipe clamp to hold pieces securely in place. Deck screws, wood glue, and finish nails are the fasteners and adhesives needed to construct the gate. A drill is crucial for making pilot holes and securing screws. One can often find these tools listed with affiliate links in free plans, but they may also be available at local hardware stores.
- Measuring: Tape measure, spirit level
- Cutting: Circular saw
- Assembling: Pipe clamp, drill
- Fastening: Deck screws, finish nails, wood glue
Building the Gate Frame
Constructing a robust gate frame is essential for creating a garden gate that is both functional and durable. Proper placement and securing of the top rail, bottom rail, and vertical pieces provide the necessary foundation for attaching the remaining components.
Assembling the Frame
One starts by laying out the horizontal frame members—the top rail and the bottom rail—parallel to each other on a flat surface. The distance between them should correspond to the desired height of the garden gate. Vertical pieces are then evenly spaced between the rails, ensuring they are perpendicular to create a rectangular frame. It is important to measure the distances carefully to ensure the gate frame is square.
- Top Rail: Place it at the top end of the vertical pieces.
- Bottom Rail: Align it with the bottom end of the vertical pieces.
- Vertical Pieces: Space them evenly between the top and bottom rails.
The components are secured at each intersection with screws or galvanised nails, reinforcing the rigidity of the gate frame. For larger frames, particularly those intended for a double gate, additional horizontal pieces may be included to prevent sagging.
Attaching the Braces
The cross brace is a crucial element in countering the gate’s tendency to sag. One should cut the brace to run diagonally from the bottom corner on the hinge side to the top corner on the latch side. The cross brace’s placement is important for the longevity of the gate and ensuring that it operates smoothly.
- Cross Brace: Position diagonally from the lower hinge-side to the upper latch-side end of the rail.
Fasten the cross brace securely to the gate frame. For added strength, one may use two braces in an ‘X’ configuration, especially when constructing a wider gate or double gate. It is essential to pre-drill holes for the screws to avoid splitting the wood and to use exterior-grade hardware resistant to corrosion.
Use the following layout for an optimal configuration:
| Component | Position | Fixing Method |
|---|---|---|
| Top Rail | Top end of vertical pieces | Screws or galvanised nails |
| Bottom Rail | Bottom end of vertical pieces | Screws or galvanised nails |
| Vertical Pieces | Between top and bottom rails, spaced evenly | Screws or galvanised nails |
| Cross Brace | Diagonal, hinge-side bottom to latch-side top | Screws, pre-drilled |
It is incumbent on the builder to verify that the garden fence is sturdy enough to support the weight of the gate, ensuring that the frame of the gate, once attached, will not compromise the fence’s integrity.

Fitting the Gate
Properly fitting a garden gate ensures functionality and longevity. One must ensure the posts are securely anchored and the gate correctly attached to the hinges to have a seamlessly operating garden gate.
Securing the Posts
The integrity of a garden gate starts with the strength of its posts. They can be a metal post if you wish, or wood. But they must be secured in the ground to bear the gate’s weight. Concrete is the most reliable material for setting fence posts, as it provides stability. The posts should be spaced apart with precise measurements that match the width of the gate plus a few millimetres for clearance. After setting the posts, it is critical to verify that they are level and aligned correctly with each other.
Gate Hinge Types:
To ensure your gate opens and closes correctly, you need to make sure you invest in some good-quality gate hinges. You can choose from a wide range of garden gate hinges, including:
- Tee hinges
- Strap hinges
- Band and gudgeon hinges
- Adjustable gate hinges
- Reversible gate hinges
- Field gate hinges
The type of hinges you choose will depend on which way you want your gate to swing. For example, field gate hinges can swing both ways, while tee hinges only swing one way. You also need to make sure that the hinge you choose is the right size and works with the rest of the materials.
The rule of thumb when choosing the right size gate hinges is to make sure they are one-third of the gate’s width.
Attaching the Gate to the Hinges
Attaching the gate to its hinges requires attention to detail to ensure the gate functions smoothly:
- Position the hinges on the correct side of the gate—the hinge side.
- The top hinge should be attached just below the top of the gate, while the bottom hinge should be affixed a few centimetres above the bottom of the gate.
- Leave a 20 mm gap between the gate and the ground to prevent it from dragging.
- Drill pilot holes into the gate to prevent wood splitting when screwing the hinges in place.
- Ensure the gate is in the right position before permanently fixing the hinges – it must be level, and the gate latch should align properly with the corresponding latch post.
- Once aligned, secure the hinges using screws, ensuring they are tight and the gate opens and closes without resistance.
By following these specific instructions, a garden gate can be fitted accurately, securing effortlessly and swinging open with ease.
Finishing Touches
Proper finishing ensures a garden gate not only functions well but also enhances the garden’s aesthetic appeal. From protective coatings to decorative hardware, finishing touches can significantly elevate the gate’s overall look.
Sanding and Finishing
Before applying any finish, one must thoroughly sand the wood to create a smooth surface. Start with a coarser grit sandpaper and work up to a finer grit for a polished finish.
- Top Tip: Between each layer of stain or paint, lightly sand the surface for better adherence and a professional-looking result.
After sanding, one has two primary options:
- Wood Stain: A wood stain can enhance the natural grain, giving the timber a richer depth. To apply, use a natural bristle brush or a cloth. Remember to work along the grain and wipe away excess stains.
- Exterior Paint: For those who prefer a pop of colour or a more uniform appearance, exterior paint is a great way. It not only adds visual interest but also acts as an additional layer of protection against the elements.
Adding Decorative Elements
To transform a functional gate into a beautiful garden gate, decorative elements are key. Consider these additions:
- Gate Latch: A stylish gate latch not only secures your gate but also serves as a focal point. Choose a design that complements the garden’s theme.
To secure your gate, you will need a durable gate latch that will make locking your gate easy, while also adding aesthetic appeal. Here are some of the most popular gate latches:
- Bolt latches
- Thumb latches
- Ring latches
- Lever latches
All of these latches provide the same function, however, they are slightly different. For example, bolt latches can only be secured from the inside of the fence, while thumb latches are installed on both sides of in-swinging gates. Ring and lever latches are also two-sided, however, they can be fitted on in-swinging and out-swinging gates.
- Hardware and Ornaments: From vintage metalwork to modern trimmings, adding hardware can make a gate stand out.
By integrating both functionality and aesthetic appeal, the finishing touches will give you gorgeous DIY garden gates and make it a standout piece in your outdoor space!
How to Build a Wooden Garden Gate
1. Measure the Fence Opening
The first thing you need to do is measure the space between the two fences where you wish to install your gate. You can do this using a tape measure. When measuring the area, make sure you consider the clearance needed for the hinge, which will require at least 5mm, while the lock side will need 10mm of clearance.
The height of the frame should also be 100mm smaller than the finished gate, as this will accommodate space for the cladding.
2. Cutting the Timber
To ensure your timber boards fit, you need to make sure you cut them correctly, making sure they match the previous measurements you have recorded for the fence opening.
To cut the timber, you should mark the area where you need to cut and then use a mitre saw to make a precise cut. You can then use clamps to line up and hold the wood together. The boards will then need to overlap, so you need to measure and make cuts where the other boards will overlap. Again, this can be done with a mitre saw. If you are worried about making a mistake, you can make a practice cut on an old piece of wood.
Once you’ve cut the timber, you can then use a hammer or chisel to remove the unwanted timber.
3. Support the Frame
To support the timber frame, you should install a piece of wood horizontally in the centre of the frame. To do this, you will need to measure the width from the inside of the frame, before cutting it and placing it in the middle of the frame.
Once the middle section is installed, you can then start to make cross bracing for your gate, as this will ensure it is long-lasting. This will involve placing two wooden panels in the top and bottom half of the frame from the bottom on the hinge side to the top on the lock side. This will need to be measured and cut, so it fits inside of the frame.
4. Secure the structure
Once everything is measured and fits together, you can then start to apply exterior wood glue to the joints and clamp them before using a drill to screw them together. Then, do the same for the middle section. To secure the cross brace, you should place the frame on top of the diagonal panels.
5. Paint the Gate
If you want to change the colour of your gate to match your fence panels, then you can apply wood stain to the frame and let it dry before installing it.
6. Fit the Frame
Once the frame is dry, you should then place it between the fence panels and clamp it in place. You can then drill the hinges on the top of the frame and the fence panel to ensure it opens and closes properly.
7. Add the Cladding
To fill in the gaps within your frame, you should use similar cladding to your fence panels. These should be cut to size, so they fit on the inside of the frame and screwed in place with a combi drill.
8. Install the Lock
Once the cladding is secure, you can start to install the lock on the opposite side of the hinges. You can secure this in place using the combi drill.
Maintaining Your Garden Gate
Proper maintenance ensures a garden gate can last for a couple of years, if not longer. It involves periodic inspections and applications of protective coatings to ward off wear and tear.

Regular Inspection
Biannual Checks: At least twice a year, one should inspect the gate for any signs of damage or wear. It’s a good idea to do this more frequently if the gate is exposed to harsh weather conditions. Look out for:
- Loose hardware (hinges, bolts, screws)
- Signs of wood rot or rust on metal parts
- Cracks or splits in wood
Last year’s harsh weather may have taken its toll, so thorough inspections can catch issues early.
Applying Protective Coatings
Wood Treatments: To preserve wooden gates, applying a protective sealant or paint every couple of years can prevent rot and decay. Steps include:
- Sanding down the surface to remove old coatings
- Applying a primer if painting
- Using a weather-resistant sealant or paint
For metal gates, use a rust-inhibitor primer followed by an appropriate outdoor metal paint to safeguard against corrosion. If there’s already rust showing, treat it first with Rust converter before priming and painting.
Frequently Asked Questions
This section addresses some common queries related to the creation of garden gates, ranging from design ideas to specific construction techniques.
What are some creative ideas for designing a garden gate?
Creative design ideas for a garden gate include rustic, vintage styles with reclaimed wood, sleek, modern designs with metal accents, and classic picket gate designs that can be personalised with unique hardware or colourful paint.
Which type of wood is best suited for constructing a durable garden gate?
Hardwoods like oak and cedar are well-regarded for constructing a durable garden gate due to their natural resistance to rot and insect damage. Treated softwoods like pine are also a popular, cost-effective choice when properly sealed and maintained.
Can you provide a guide for making a garden gate using a kit?
Garden gate kits typically come with all the necessary components and hardware. One must assemble the gate by following the included step-by-step instructions, ensuring that each component is correctly aligned and secured.
What are the steps to build a garden gate from scratch using basic materials like 2x4s?
To build a garden gate from scratch, one begins by measuring the gate opening and cutting the 2x4s to size for the frame. Next, they assemble the frame using screws, then add vertical planks for the gate’s face, ensuring even spacing. Finally, hinges and a latch are attached to complete the installation.
How can I integrate wire mesh into my wooden garden gate design?
To integrate stainless steel welded wire mesh, you should first construct the wooden gate frame and then staple the wire mesh to the backside of the gate, ensuring it’s pulled tight and securely fixed to the frame to maintain structure and provide added security.
What is the recommended clearance between the bottom of a garden gate and the ground?
The recommended clearance between the bottom of a garden gate and the ground is typically between 5 to 10 centimetres to prevent the gate from dragging on the ground while allowing sufficient airflow and space for movement.